Last Updated on February 23, 2024
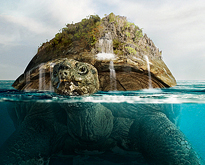
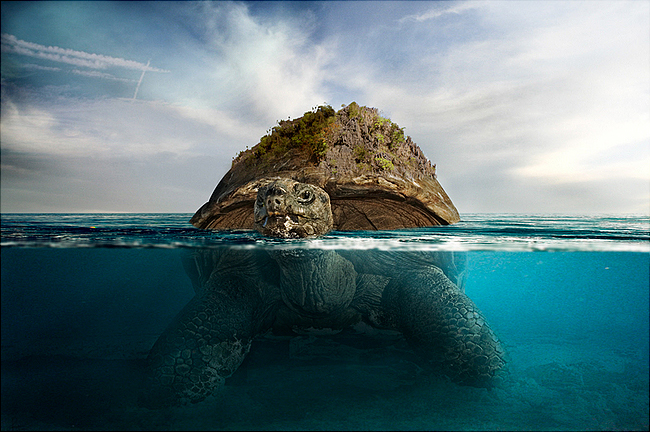
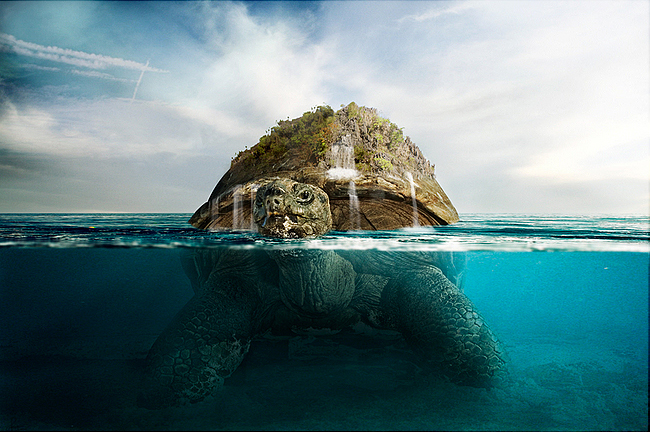
This Photoshop tutorial will teach you how to create an beautiful underwater turtle photo-manipulation. Here are the images that you will need for this tutorial:
Requirements:
- Underwater Image
- Optional Sky
- Waterfall Brush
- Island
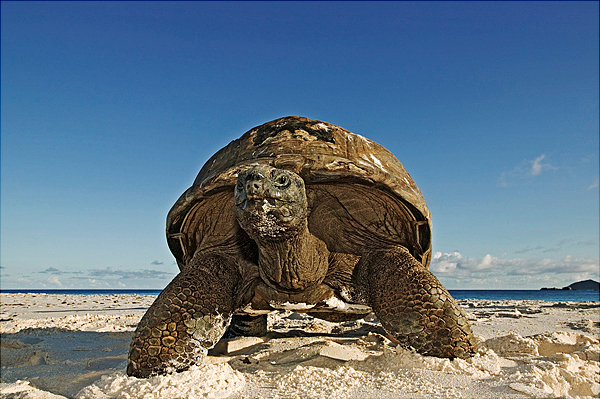
- Turtle
- Water
Step 1
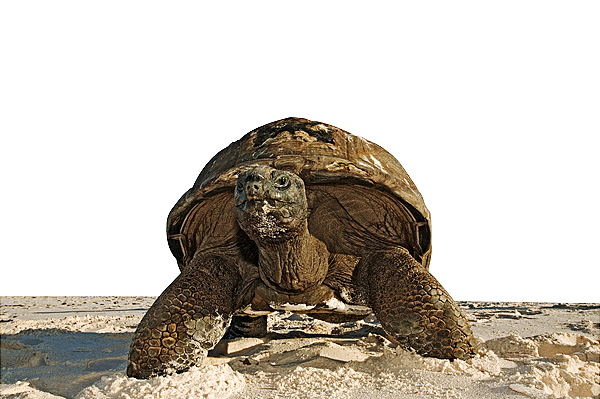
First select a cool image. I selected this turtle image. Duplicate the original turtle image and hide the bottom(1st layer). Now, you will erase the sky as shown in the images below. Keep only the turtle and the sand. You may do so by any method you prefer. You can erase the background by using masking, pen tool, polygonal lasso tool or any other method. Name the layer as turtle.
Step 2
Open an image of the ocean.
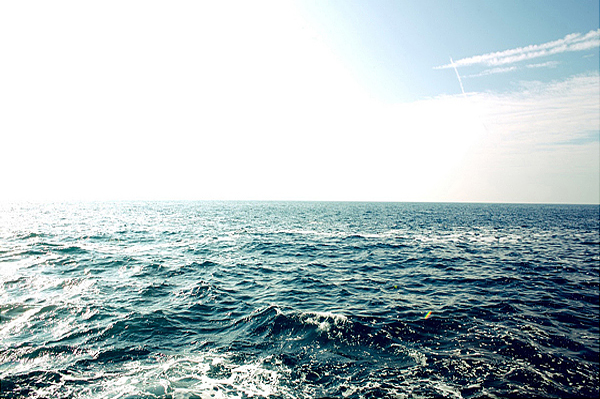
Select the ocean image and place it over the turtle image layer. The ocean is smaller than the turtle so you must press crt+t and hold down the shift button to re-size the sea, making it bigger. Look at the image below.
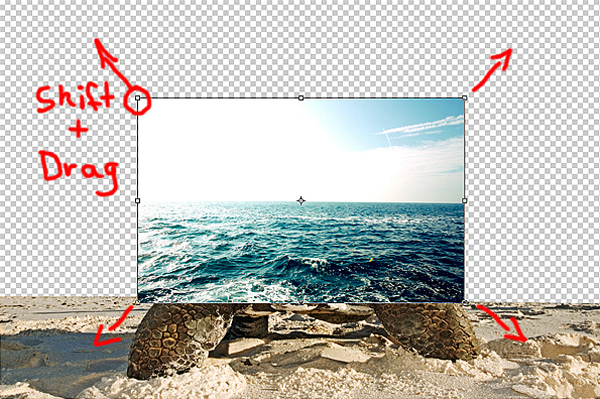
Adjust the image at a slight angle.
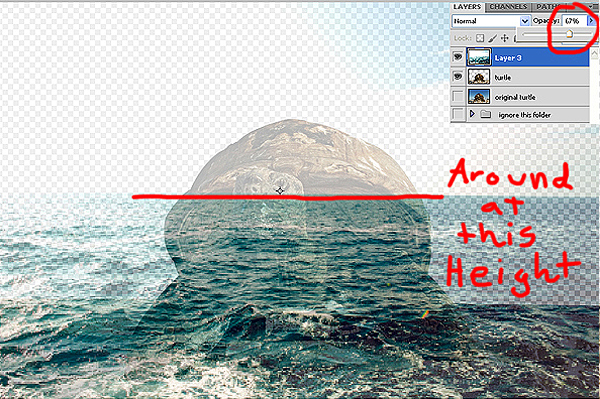
Step 3
Now use the “Rectangular Marquee Tool” to select the sea.
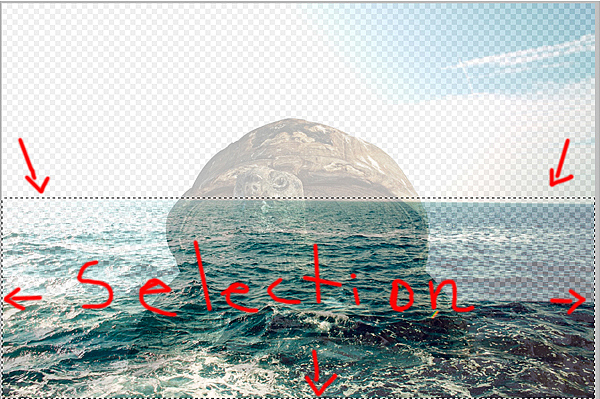
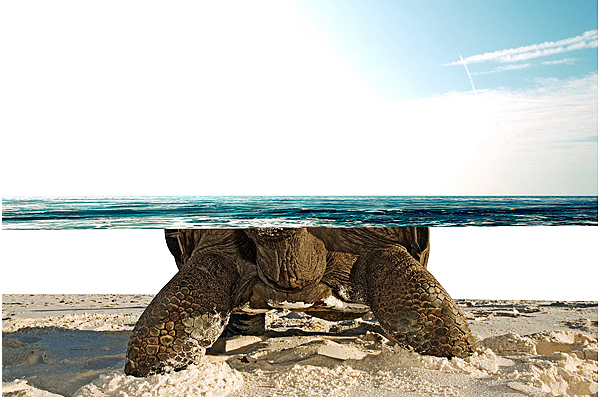
Once selected, click crt + t and right click the mouse to select the “Distort” option. This will allow you to distort the edges of the selection. Distort the bottom edges as shown in the image below.
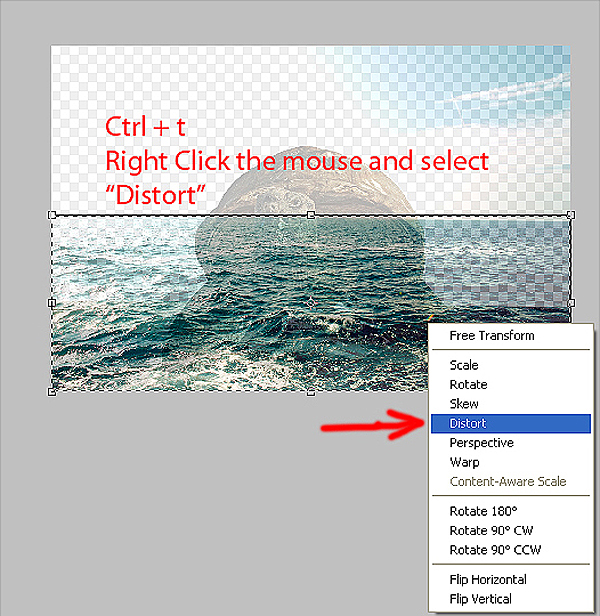

This is done so the perspective of the water matches up with the overall image. Your image should look something like the image below.
Step 4
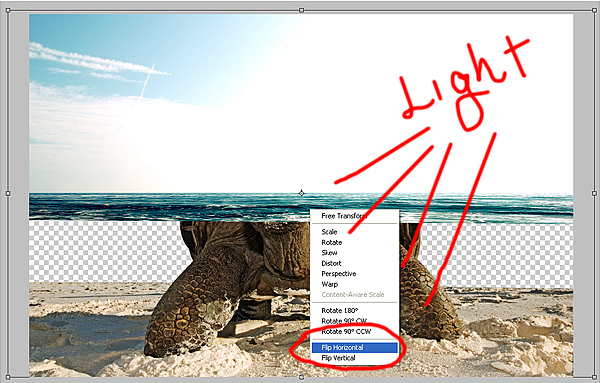
You will need the original light from the sky in the future and it will need to be the opposite way around because of the lighting on the turtle. Therefore, you click ctrl + T on the sky/ocean image and right click the mouse to flip the image horizontally.
Step 5
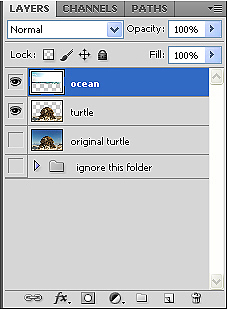
Name the ocean layer as ocean.
Step 6
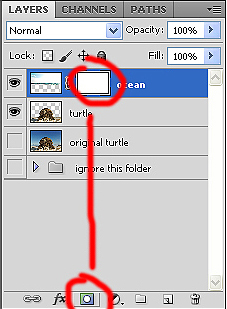
Now for the meat of the tutorial. Create a clip-mask on the ocean layer.
Step 7
This step can be pretty tricky but very useful. With the crtl button pressed, click on the turtle layer. This will make a selection over the whole turtle as shown in the image below.
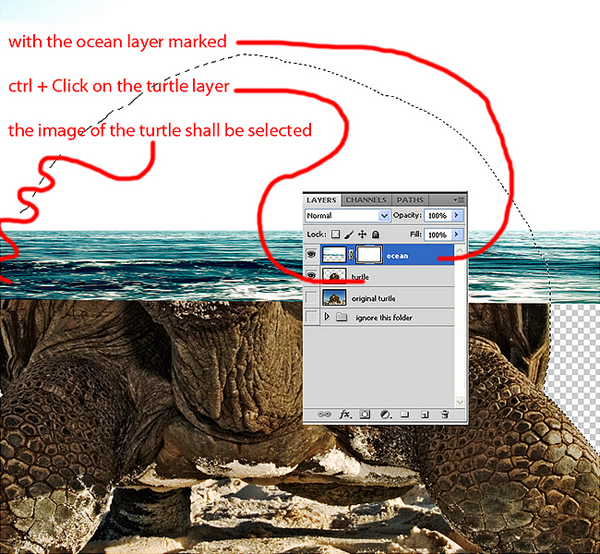
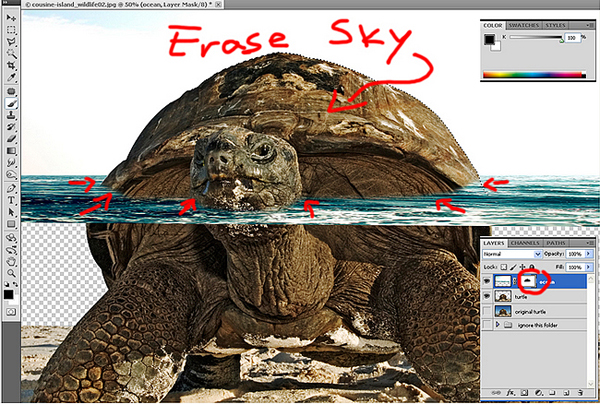
Now, erase the water and sky from around the turtle.
Step 8
Choose an underwater image.
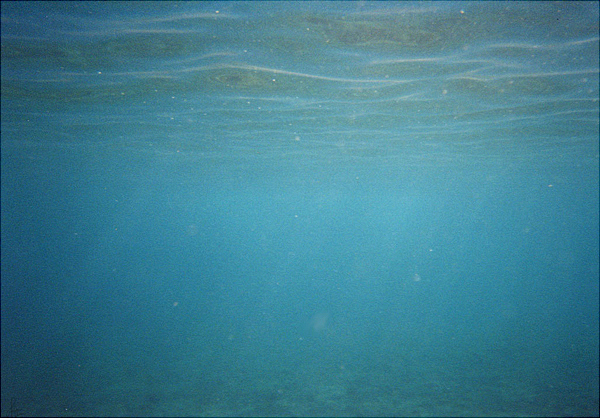
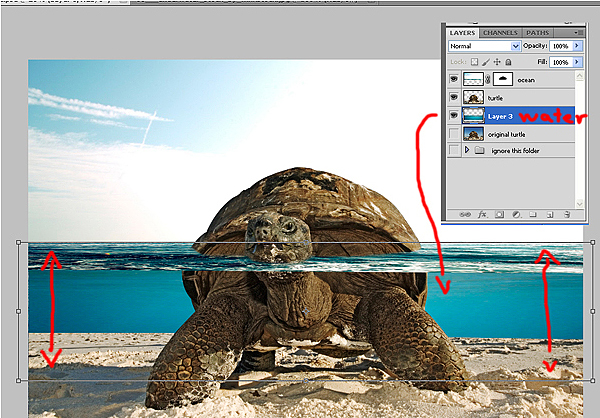
Select the image and paste it under the turtle layers. Now re-size the image so it looks like the picture below. Name this layer underwater.
Step 9
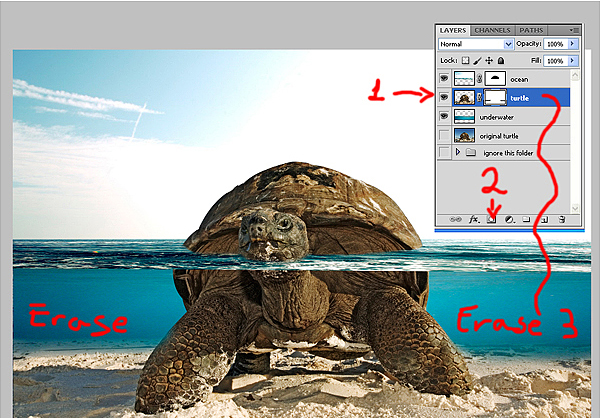
Clip-mask the turtle image and gradually erase the sharp edges until it looks like the image below. This will give more perspective to the underwater scene.
Step 10
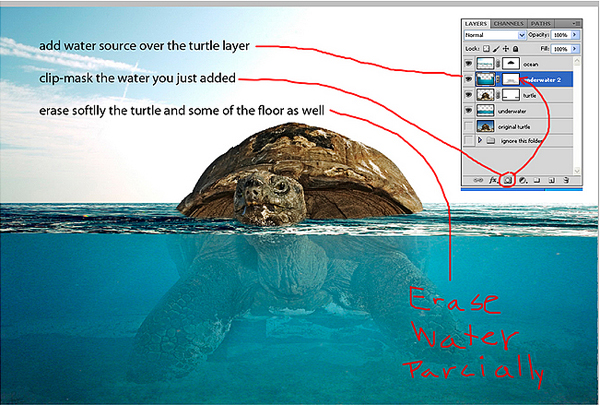
Open the underwater image from step 8 and place it over the turtle image. If part of the water gets put over the top part of the turtle(the part that is over the water) just erase it normally with the eraser tool. Create a clip-mask for the bottom part and gradually erase the turtle’s body until you make a replica of the image below.
Step 11
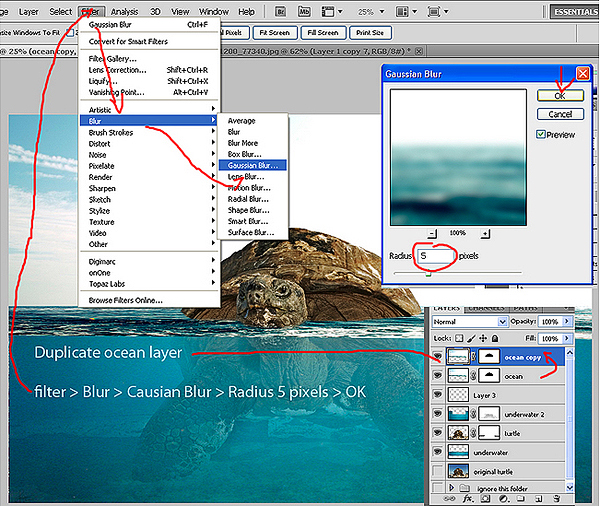
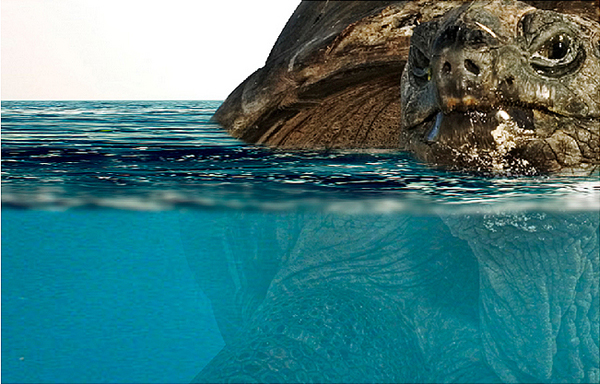
Duplicate the ocean/sky layer and blur it as shown in the image below.
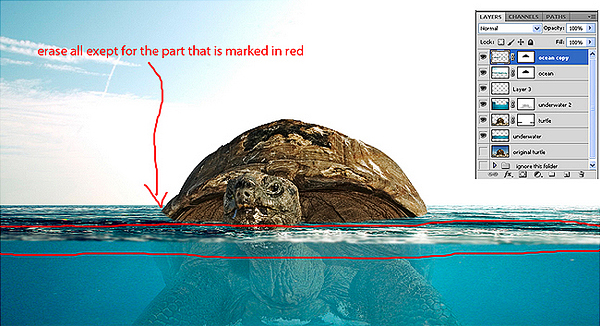
Lower the blur layer by a few clicks with the down keyboard button. Erase the top part of that layer leaving only the blurry boarder.
Step 12
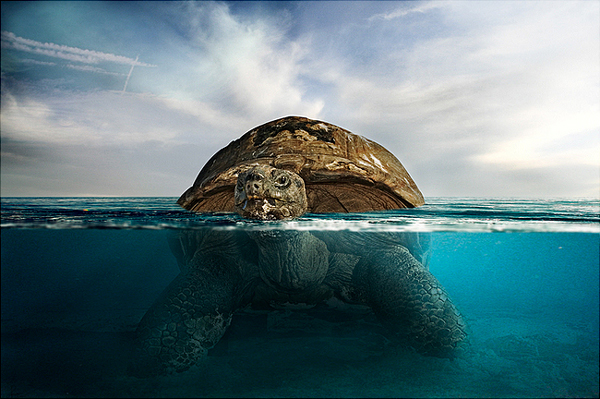
These are the basics to create an underwater image. Keep working with the lighting and colors to create your final image.
We hope you enjoyed the tutorial. Do not forget to check out DailyGraphicDesign.com and please add them on Twitter for constant updates! For more inspirational tutorials don’t forget to subscribe to the RSS-feed and follow Inspirationfeed on Twitter+ Facebook! If you enjoyed the following article we humbly ask you to comment, and help us spread the word!

