Last Updated on February 27, 2024
It’s no secret that people love to watch videos. Whether it’s a YouTube clip or a film, video content is engaging and easy to understand. If you have something you want to share: a process workflow for the office, a game walkthrough, a painting tutorial – videos can bring it to a whole new level.
Today’s technology, such as screen recorder for PC and mobile, makes it easy to create content like explainer videos.
Here’s a quick primer on what it is, and why it’s the method of choice for content creators everywhere.
What is an explainer video and why do you need one?
An explainer video is a visual introduction to your subject, product, company, or service.
It’s a wonderful way to give a quick overview of what you’re offering, or what your organization is about. A great explainer video allows you to get your message across in a simple and engaging way. That’s why it’s particularly popular with startups.
You can use explainer videos to introduce your company, explain a historical event, clarify your vision and strategy, communicate corporate change, or describe your business idea. Through the power of digital storytelling, you can communicate in a professional environment, teach students, or promote important issues.
Explainer videos can be used in almost any situation, by anyone. You don’t have to be a CEO or YouTube Influencer in order to take advantage of this type of content. As long as you have a message you want to share, videos are a fantastic and potent medium to showcase your stories.
How to make an animated explainer video?

Creating this type of instructional video can seem like a daunting task. Many people think they have to hire a video production company to get it done. While that is always an option, it’s not a requirement. In a lot of cases, with just a little know-how, determination, and of course, a video editor like Wondershare DemoCreator, anyone can create a great animated explainer video.
Here’s how:
Step 1: Choose a video style.
Before anything else, decide on the kind of video you want to make. Will it be a live presentation type with you talking in front of the camera? Or do you want a tutorial type that includes narrations and screen captures? Have an idea of how long you want the video to be. Make it crystal clear by drafting a plan or creating a storyboard.
Next, make sure you have downloaded and installed Wondershare DemoCreator. This screen recorder and video editor software are compatible with both Mac and Windows, so you shouldn’t encounter any issues. After installation, don’t forget to access all its amazing features!
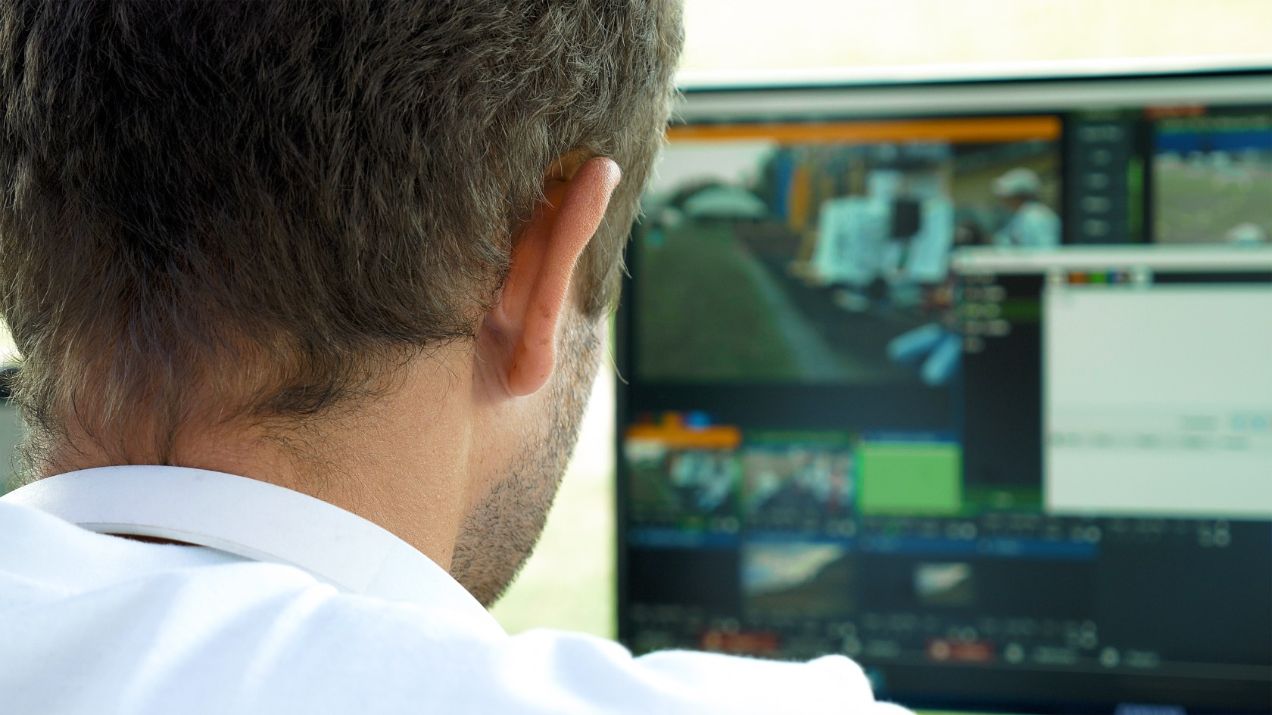
Step 2: Record your screen and voice over.
DemoCreator lets you choose what to record: full screen, a customized region, or only a target window. Pick your screen capture settings and frame rate.
After that, select your audio setup. Choose to capture only sounds from the computer, from your microphone, or both. If you want to record from only one source, pick ‘Don’t Capture’ next to the option.
Once you’re ready to record, just click the red capture button on the DemoCreator window or press F10 on your keyboard. The tool will count to three before it begins recording.
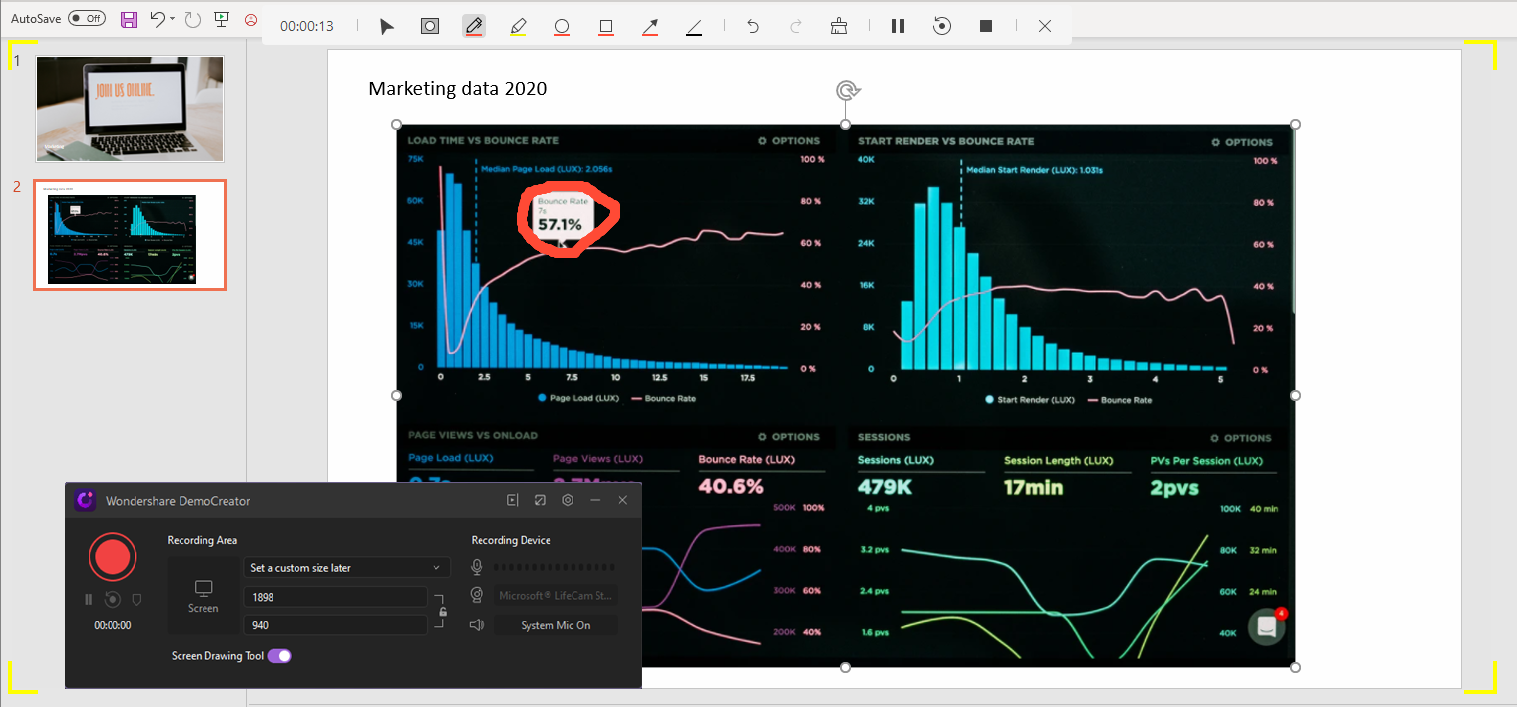
During the recording, you have the option to: use the screen drawing tools, highlight a region using the spotlight tool, or customize the size of your recording area.
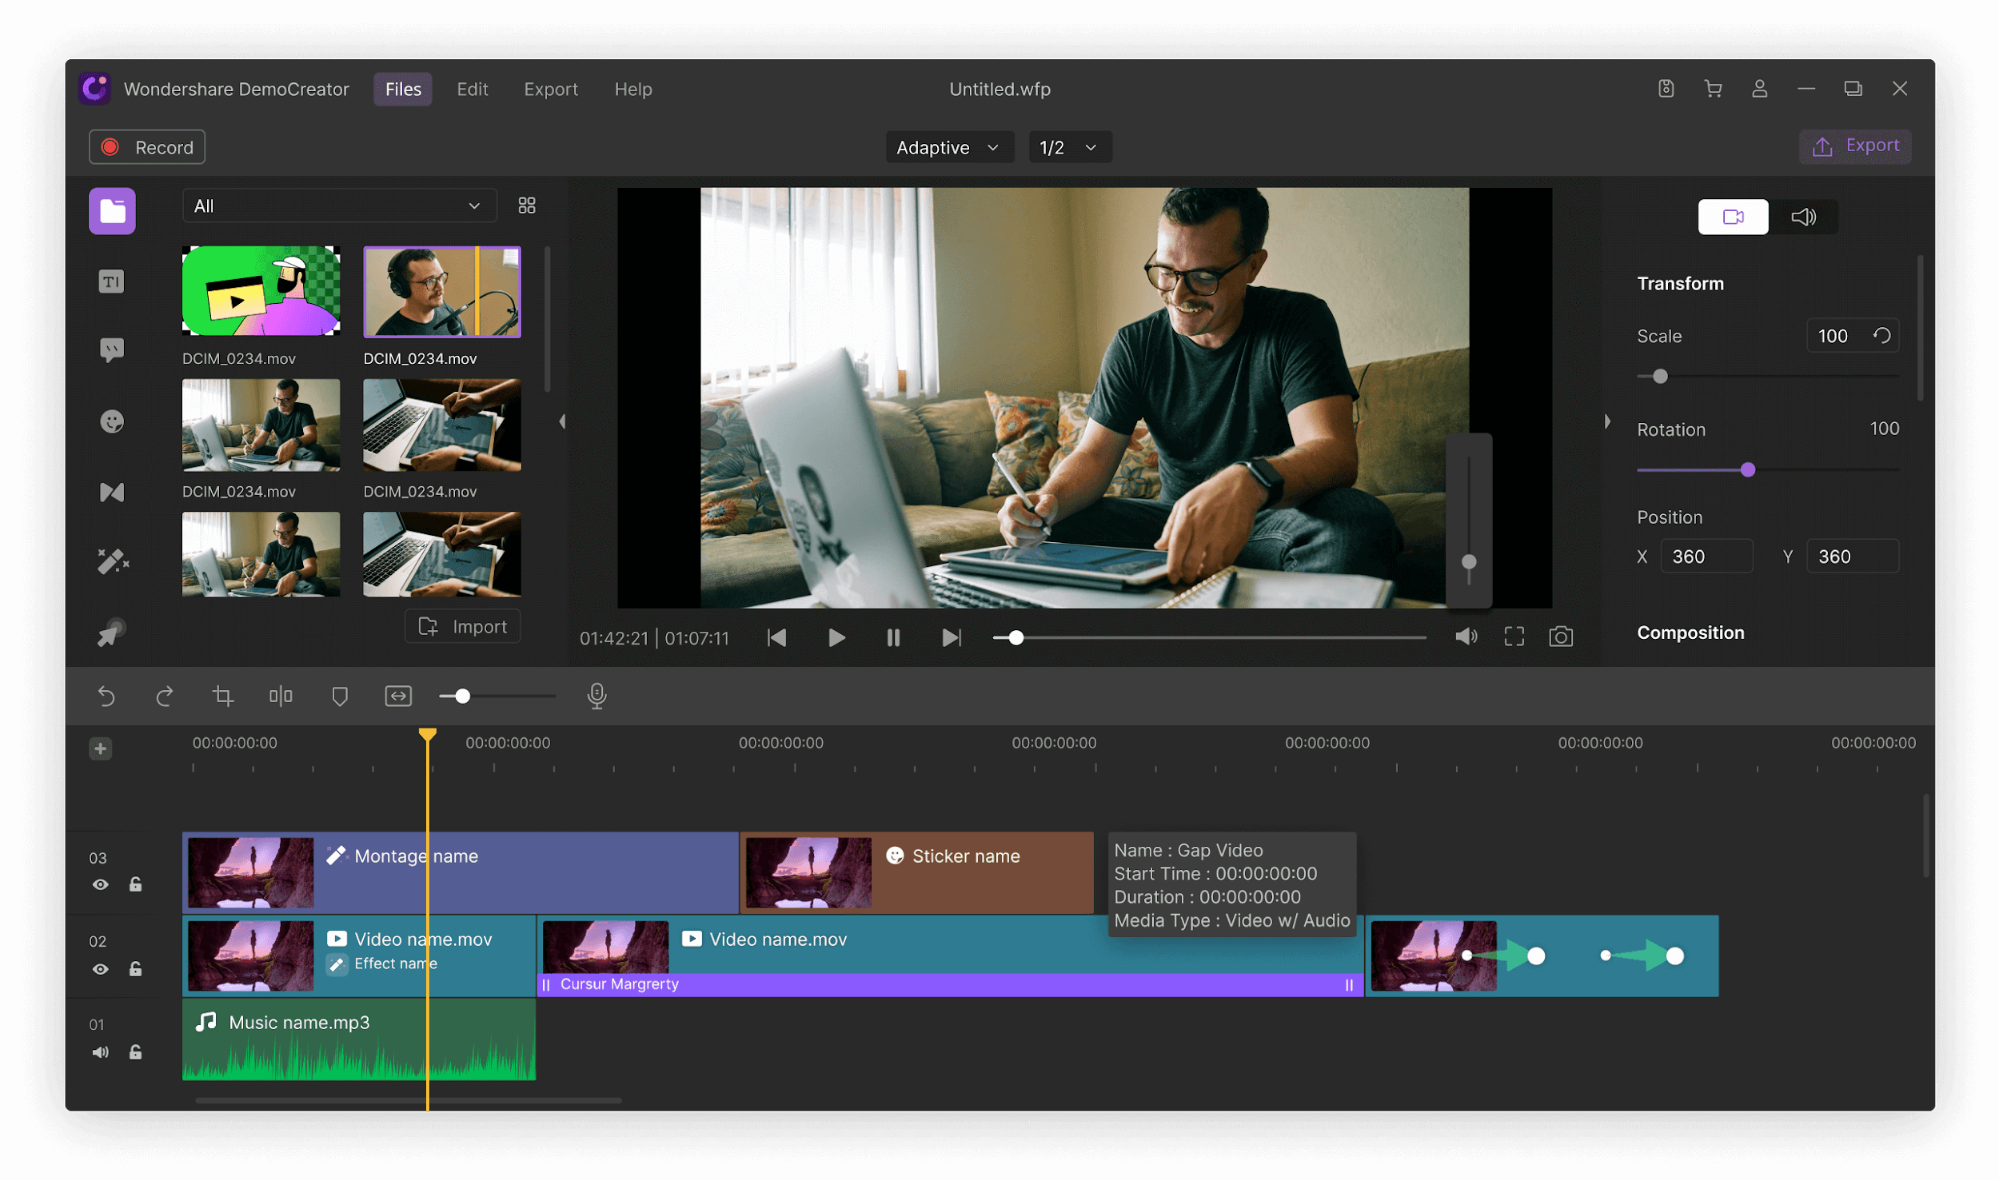
Step 3: Edit your recorded video and/or audio narration.
You’ve gathered the raw materials, now it’s time to forge a masterpiece! Wondershare DemoCreator lets you do basic editing to remove bad takes, bloopers, and anything you don’t want to use. You can also add captions and annotations to convey your message more clearly. It helps you to remove background noise (Audio Denoise function), too.
Other awesome stuff you can do include:
- Add media files, like stickers, to the timeline
- Audio Fade In and Fade Out
- Trim, rotate, crop, split, cut video clips
- Draw a border
- Playback resolution
- SnapShot (a still image of a video frame)
- Add voice over
- PIP (Picture in Picture) Mode
- Time Stretch; and
- Freeze Frame
Don’t forget to Preview your video clip to ensure you like what you see.
Step 4: Add music!
Even if it’s just in the intro or the closing, consider adding a bit of music to set the tone and mood for your video. Music can convey emotion and energy that narration alone lacks. To do this, import an audio file as Media into DemoCreator.
Music doesn’t have to be long. There are 10 to 15-second music clips on YouTube you can download for free. Just make sure that they’re royalty-free to save yourself some trouble!
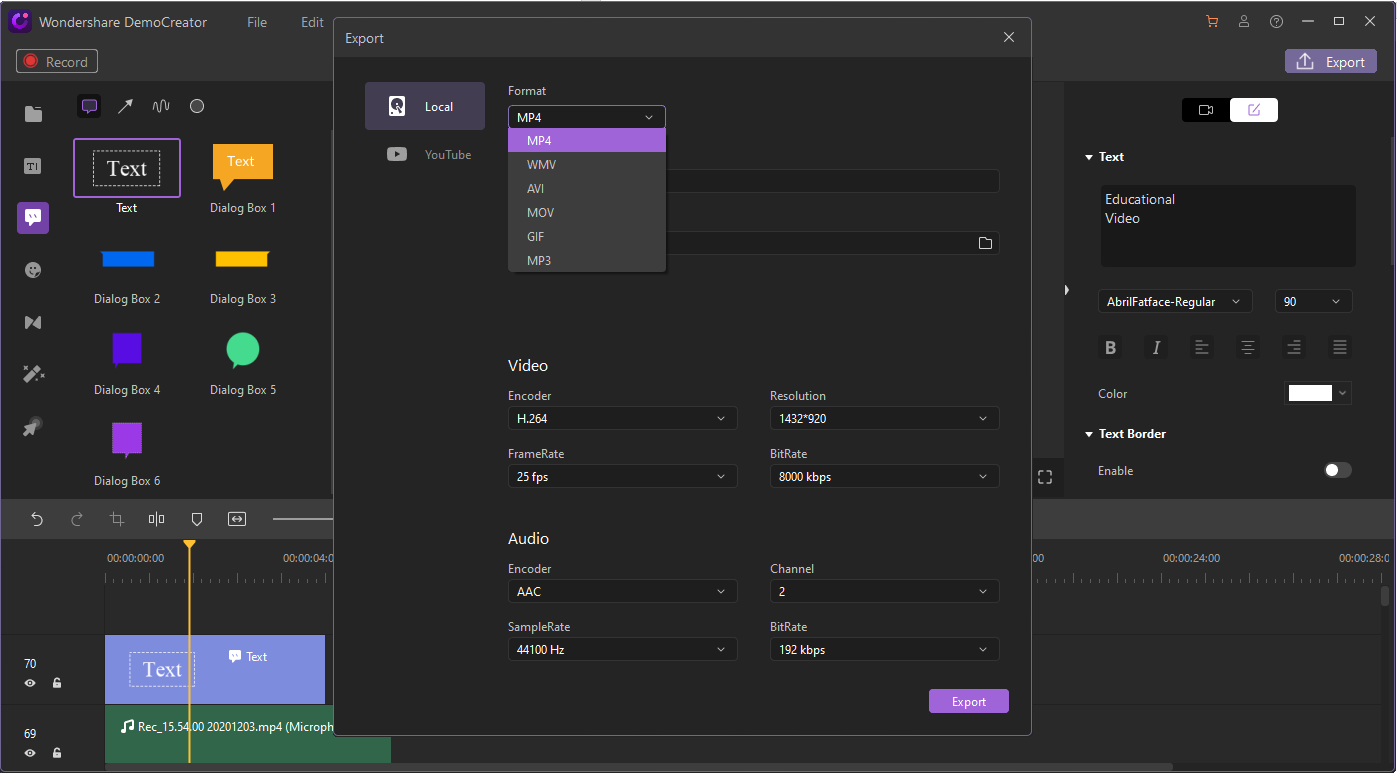
Step 5: Export your finished product.
When you’re happy with everything, click ‘Export’. You can export your video as an MP3, MP4, GIF, WMV, AVI, or MOV. MP4 is a versatile format that will allow you to view your video on various gadgets such as smartphones, TVs, and PCs.
On the Export page, you will find options for renaming the file, picking a folder, as well as adjustments for resolution, frame rate, bitrate, and other settings. Remember: the higher the resolution, the bigger the file. So it might take a while to save on your device. You can also export directly to YouTube platforms.
And that’s everything you need to know on creating an explainer video with Wondershare DemoCreator.
In Conclusion
As you have seen, it’s not difficult or complicated at all. On the contrary, it’s quick, easy, and fun! Screen recorders and video editor tools make content creation a breeze for anyone, from beginners to pros. So if you’ve always wanted to share your expertise through video, then start your journey with Wondershare DemoCreator.
Want more tools and tips for storytelling? Visit the Wondershare DemoCreator official website to learn more.